Drywall Repair Case Study 4

Project 5
Wall Repair
Ocala, Florida
Hawk & Trowel Texture
Legacy Properties are a great fit for our service profile! This particular property was a 3rd- Generation Farm. We were honored to be a part of the revitalization of this home, while keeping it era-specific during the rehab process.
1.Prep!
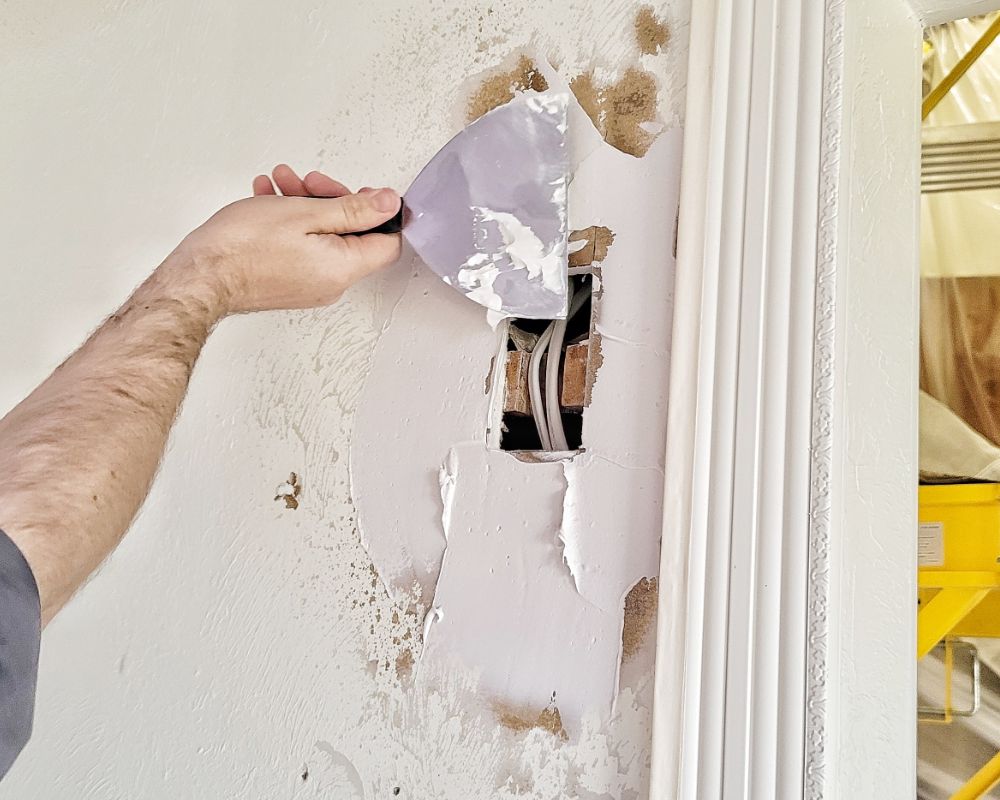
This was essentially a whole house remodel. Appropriate floor protections, and sectioning off sensitive areas of the home had already occurred. This defect was necessary due to the wiring in of a new light switch.
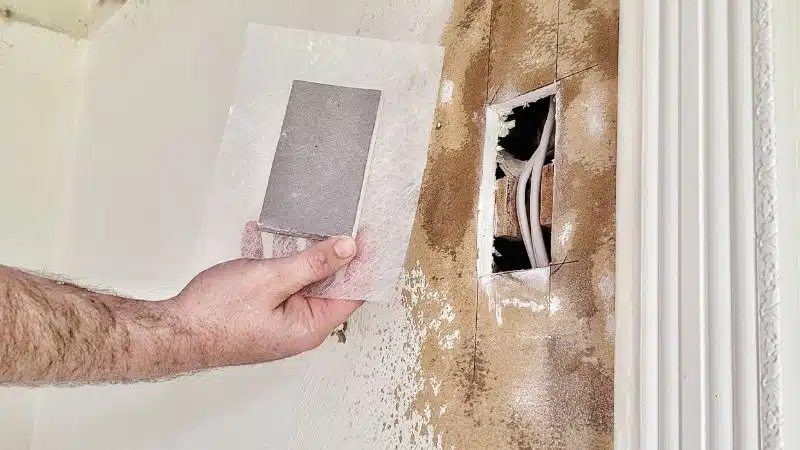
2. Identify Extent of Repair Area
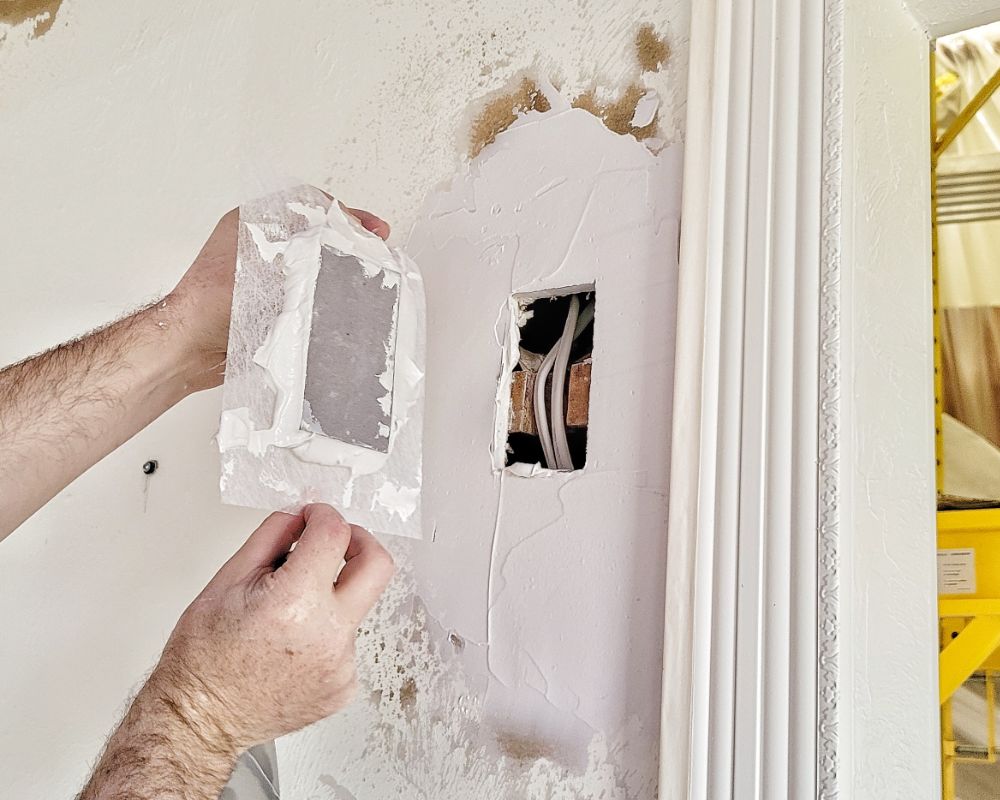
This area had evident, very shallow electrical lines. Before final texture, there was a nail plate installed to protect the electric lines from the odd nail or screw that may be mounted in the stud.
3. Patch Prep
The texture was ground down to the face of the board using 60 grit Cubitron II™ sandpaper on a Bosch® 6” Random Orbital Sander with appropriate dust extraction. This is an efficient way to ensure a quality repair. With natural lighting cascading across the face of the repair area, care must be paid to the profile and execution of the patch area . The affected was treated with Gardz™ problem surface sealer after being dusted/ wiped down.
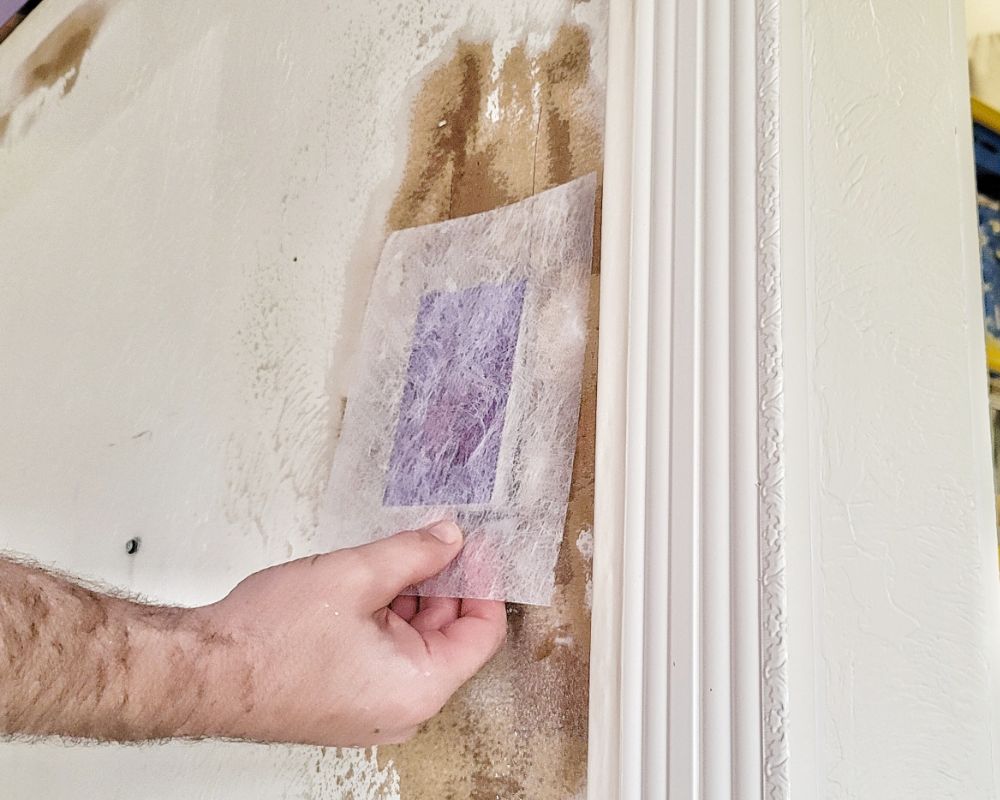
4. Patch Application
Cali Patch, Blow-Out Patch, Butterfly Patch; These are all distinctions used to describe this drywall patch type. 6” Fibafuse™ was applied using Trim- Tex® 847™ Spray Adhesive. The tape legs are left about 2” long. The patch AND the sheetrock ends of the patch are back-buttered, and the repair area coated w/ an 1/8” layer of mud as well.
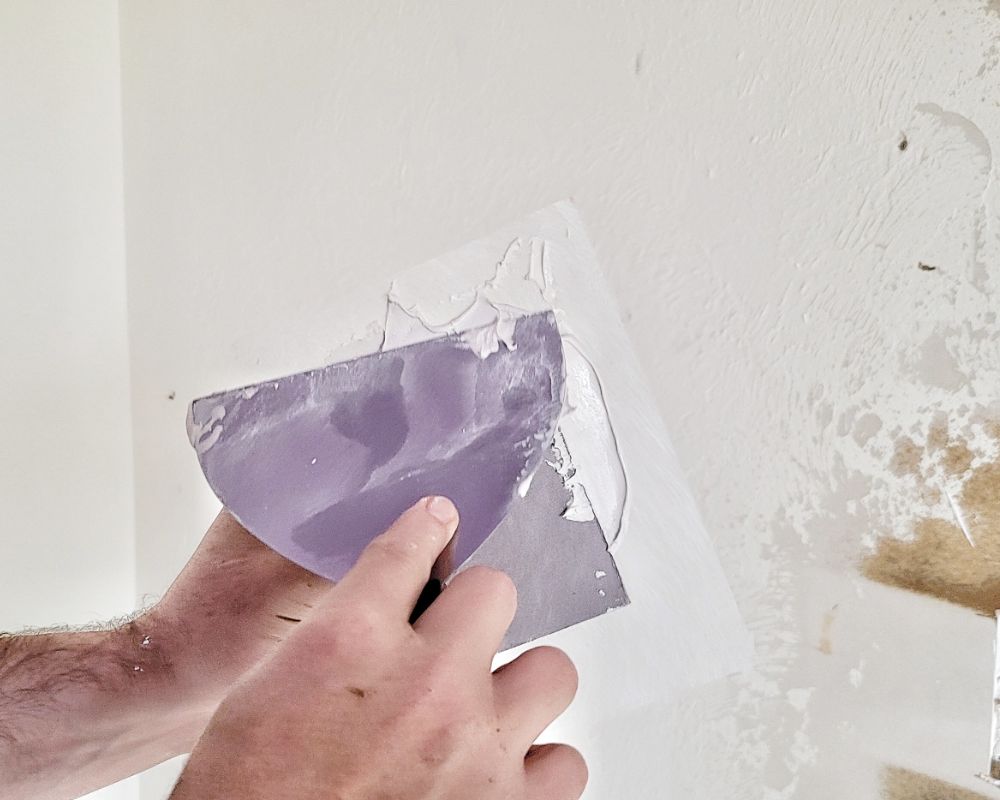
5. Prepack / Patch Installation
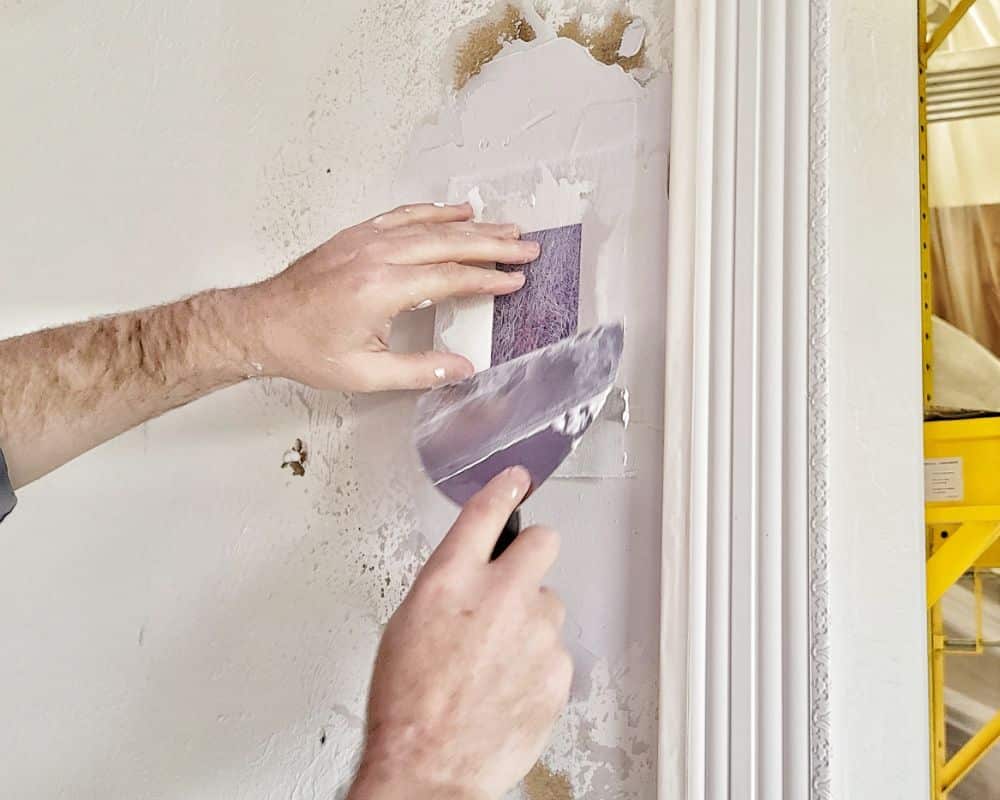
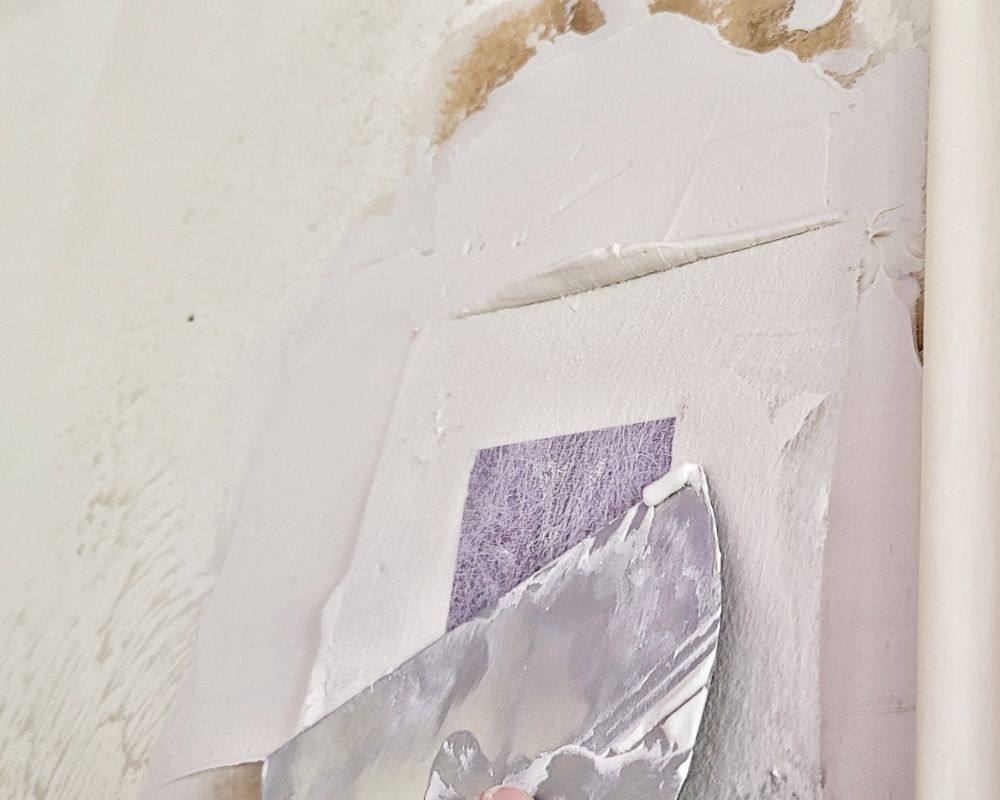
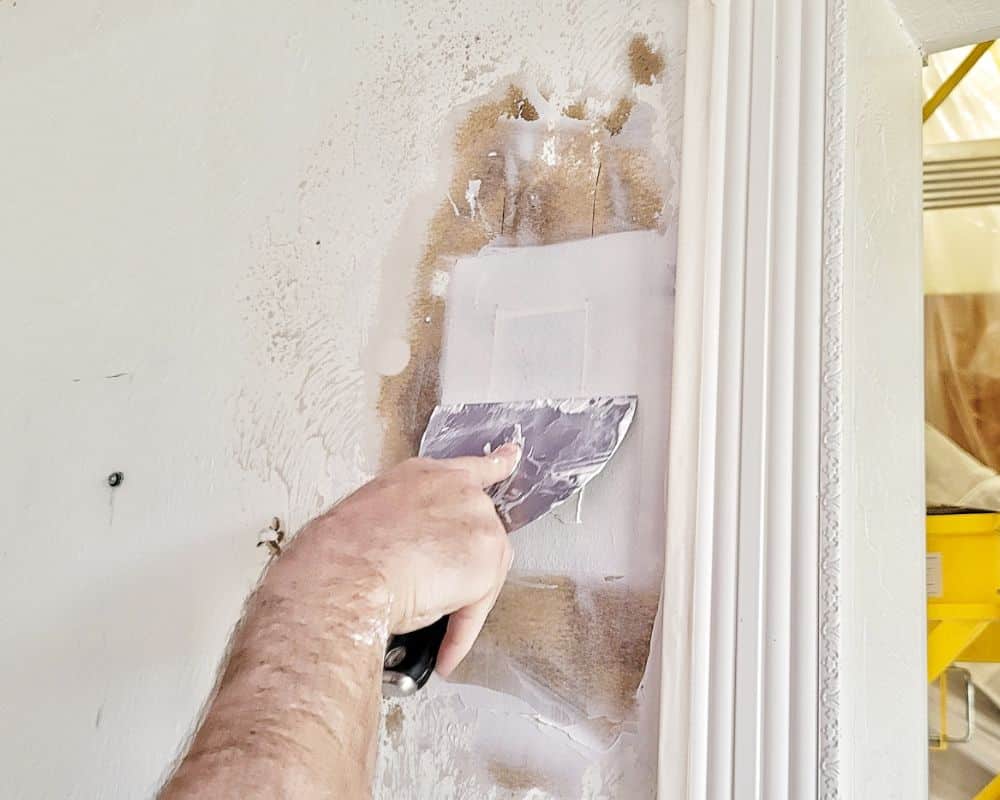
A dry fit occurs BEFORE patch installation. Once the patch and the wall have been mudded, the patch is pressed into place. The mud is worked thru the face of the tape, and out the sides of the patch with a drywall knife from the middle of the patch to the edges, taking care not to tear the material.
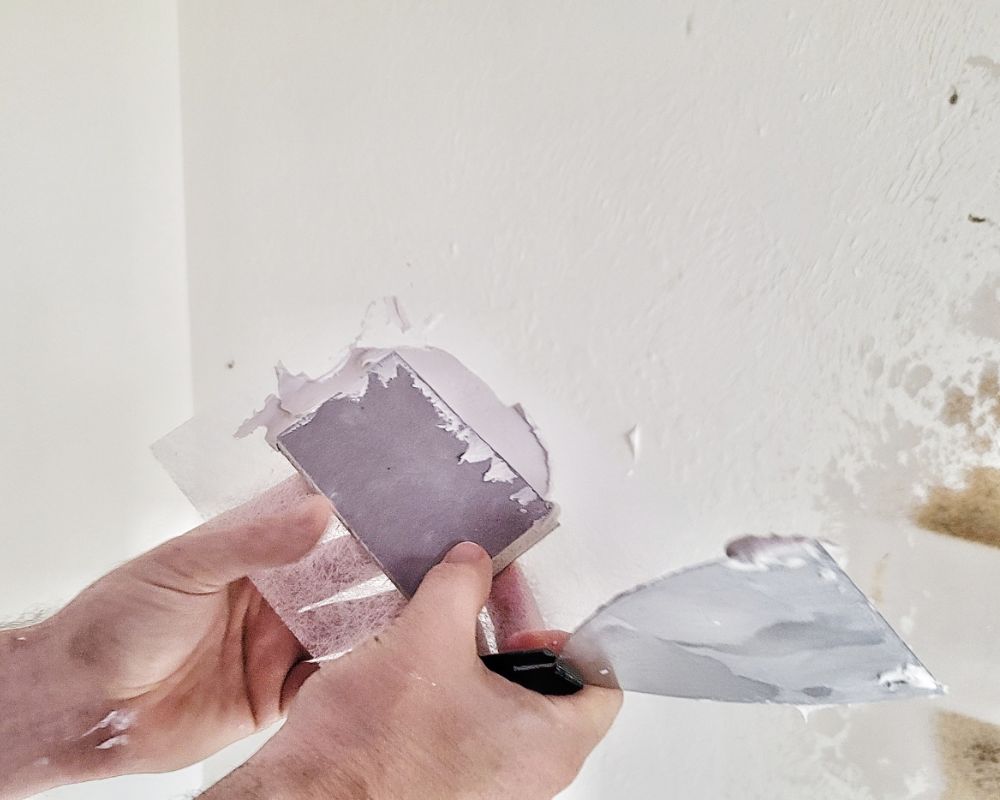
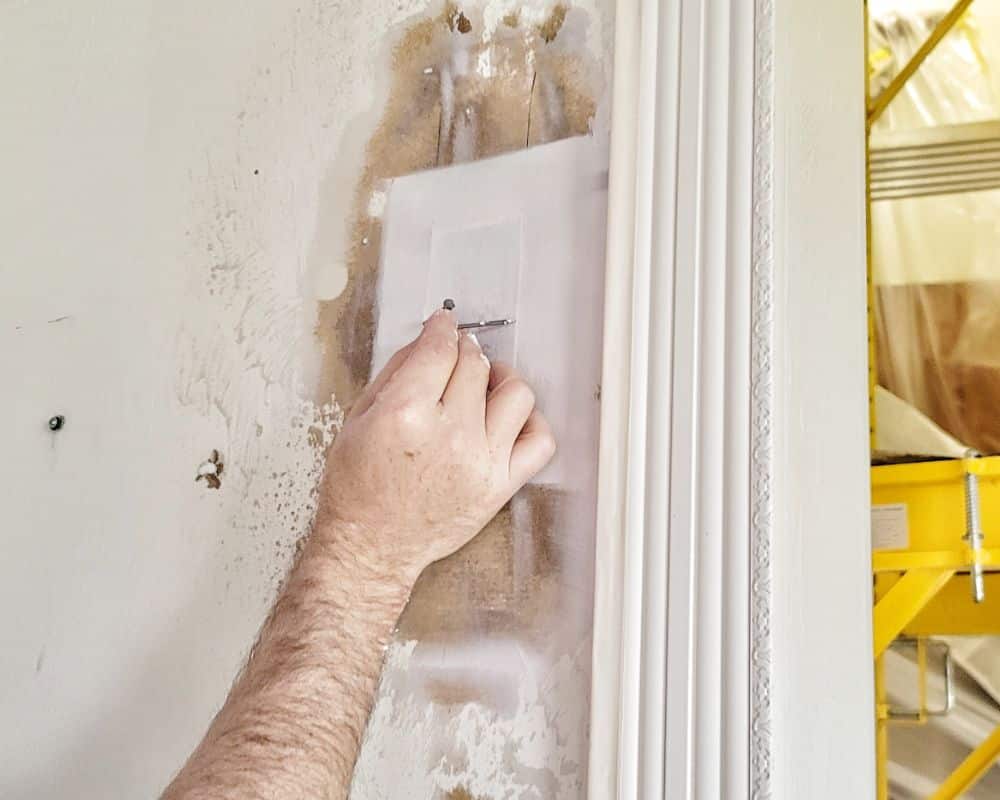
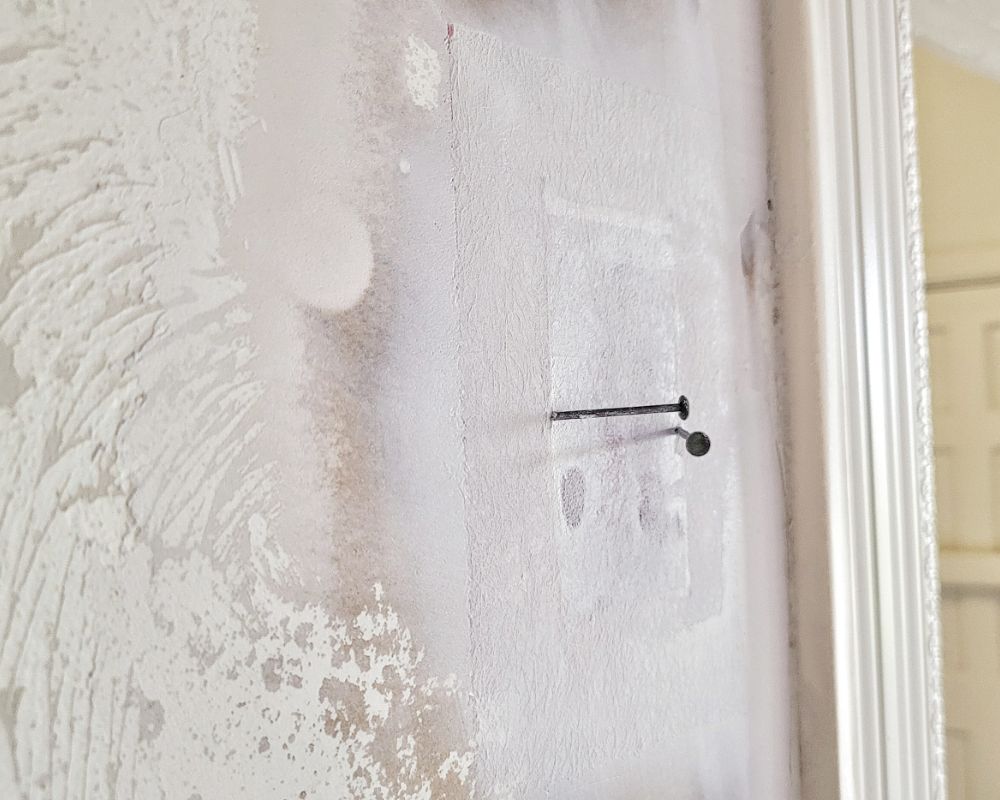
6. Patch Execution
Once the patch is in place, a few drywall nails placed at a 45* angle keep the plug patch static until the mud cures. In a traditional blowout patch, this isn’t feasible; the likelihood of material deformation or breaking mud continuity on the back of the paper outweighs the potential benefit of preventing surface protrusion. With Fibafuse™, this is a non-issue.
7. Coat, Skim, Texture
Although not shown here, this is pretty straightforward. Most of our repairs, when using Fibafuse™, tape and 1st coat happen simultaneously. IN this case, the need for a strict adherence to plane deformation takes precedence. The subsequent fill, skim, and texture coats are foregone until the patch is static.
9. Easter Egg / Pro Tip
Order your materials and standard stick ahead of a project! An extra $60 for a case of material can be the difference of days of production gain or loss.