Drywall Repair Case Study 1

Patch 1
North Ocala, Florida
Living Room Wall and Ceiling Repair
Knockdown Texture
1. Prep!
Drywall dust is EXTREMELY fine; you'll want to protect your floor with plastic sheeting and contain the repair area w/ walls as well. You can see here in the background the applicated use of our ZipWall® ZipPoles®. Plastic sheeting separation can also be accomplished by applying a piece of tape to the edge of the plastic, doubling it over a few times, and then using a thumbtack or staple to secure the plastic to the ceiling.
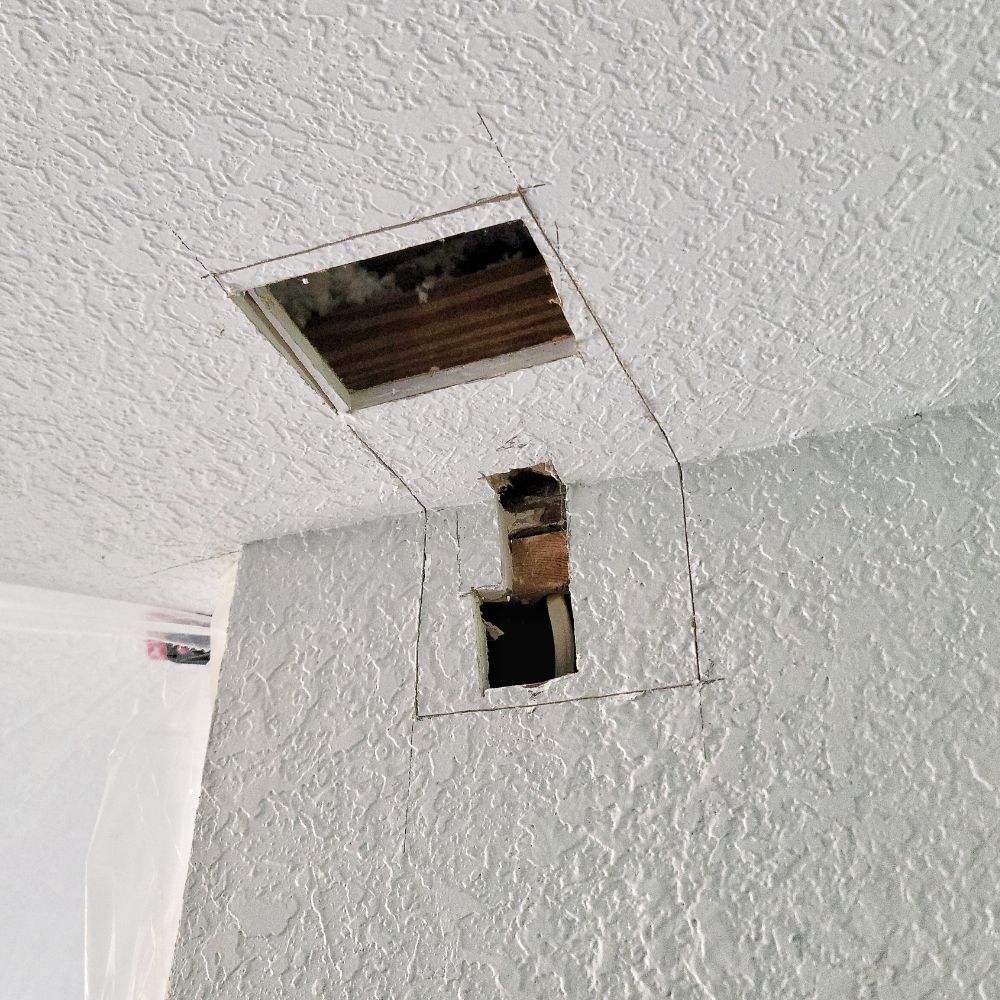
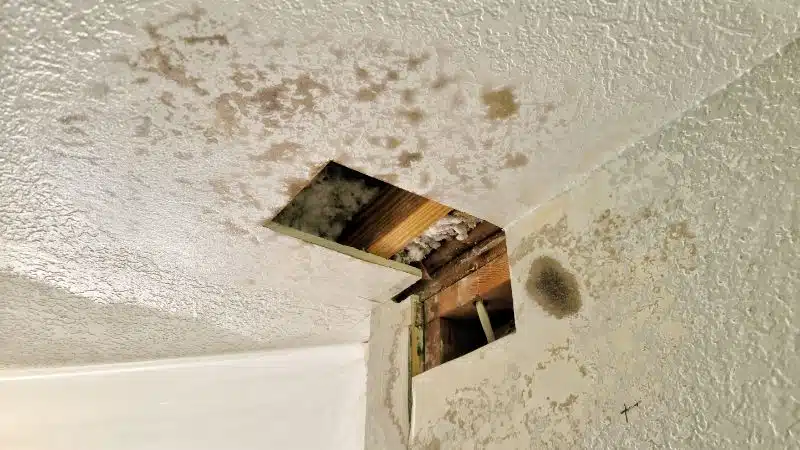
2. Identify Extent of Repair Area
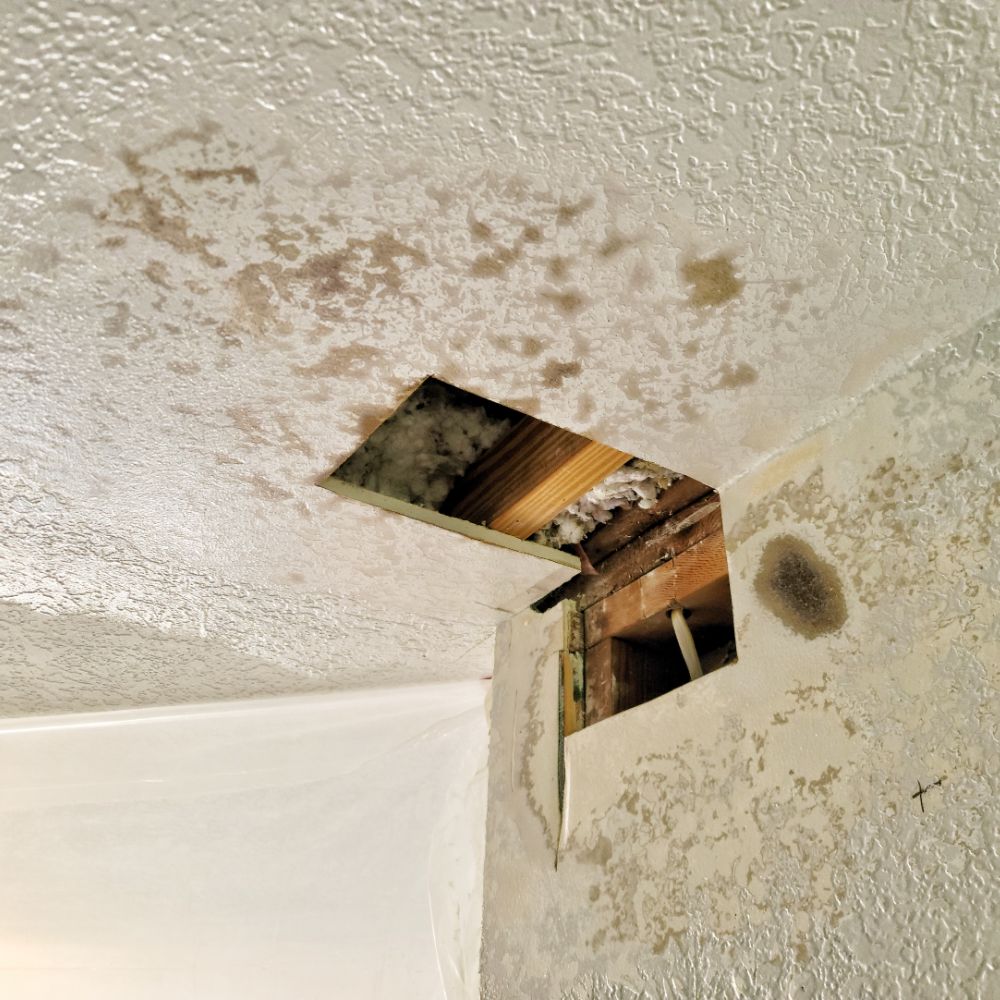
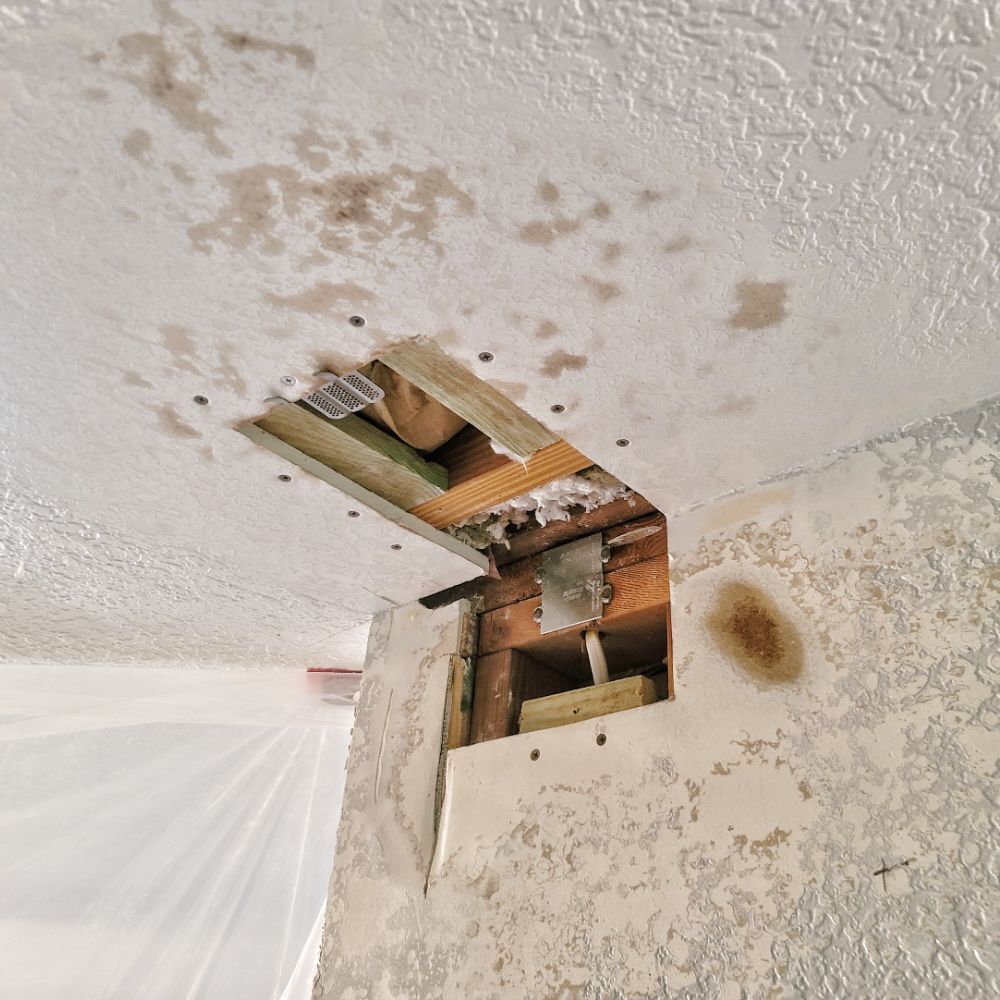
The presence of AC, Plumbing, Electrical Systems must all be identified. If not, you'll end up with an expensive repair bill! In this photo, you’ll see that the lines were not properly protected; we add nail-plates during the course of this repair.
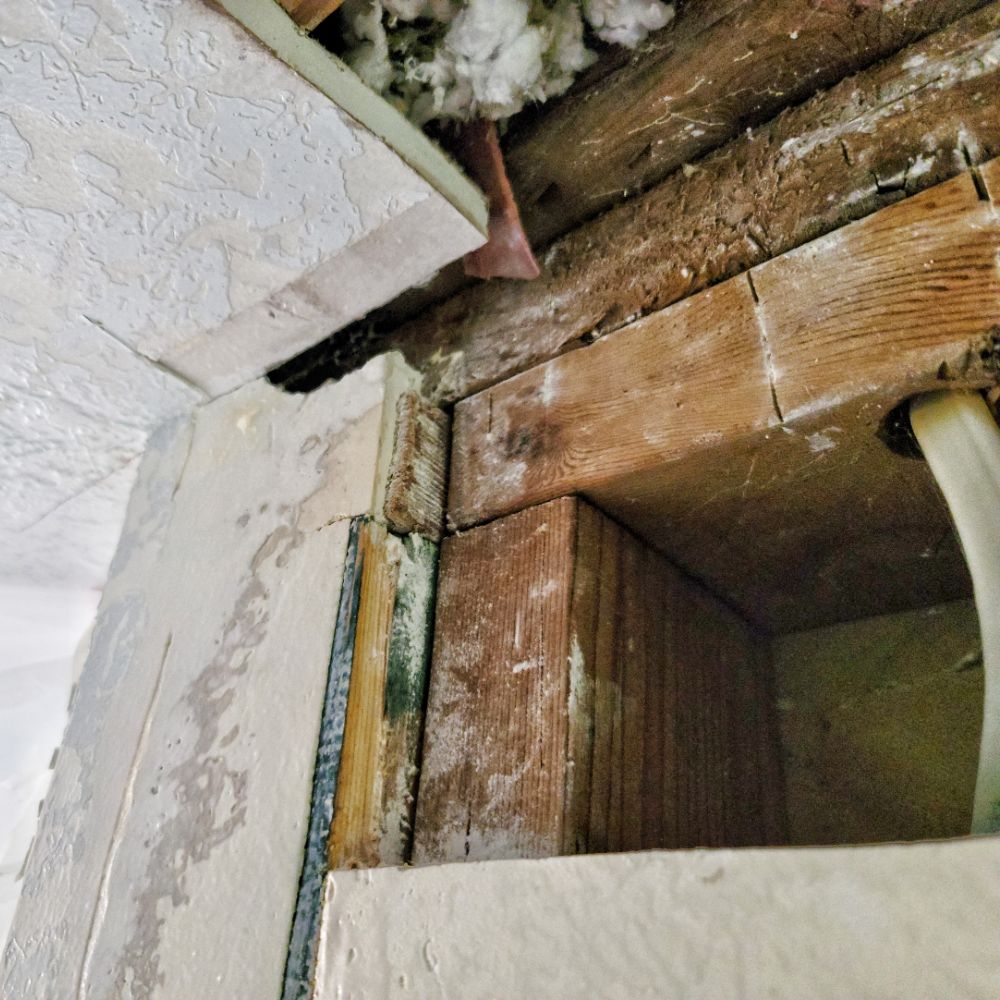
Prior damage, material issues due to age, and type/ location of framing members are all considerations when trying to figure out what needs to go, and what can stay in a drywall repair. Make sure that as you slice into the sheetrock, you are trying NOT to go beyond the back side of the sheetrock. That means a sawsall, and even a razorblade improperly used, can cause serious damage to the underlying systems. Go slow, be methodical.
3. Patch Prep
In a texture application, all the surrounding texture should be removed to facilitate a comprehensive, OEM quality repair. We’ve all seen a bad repair- it’s like a bad relationship. No one really has to explain it, for it’s on display for ALL the world to see. And the deeper you dig into it, the more gnarly you’ll find yourself left with disclosures that will shock you. Removing all the overburdening paint, texture, tape, and mud allows for the new installation of materials so that the finished product is at the same level, or plane, as the original material. Once the area has been ground down, we wipe it with a microfiber cloth, removing dust and debris. Following that, we apply a surface sealer/ primer; this is key to ensuring that new mud will stick to the surface of the sheetrock.
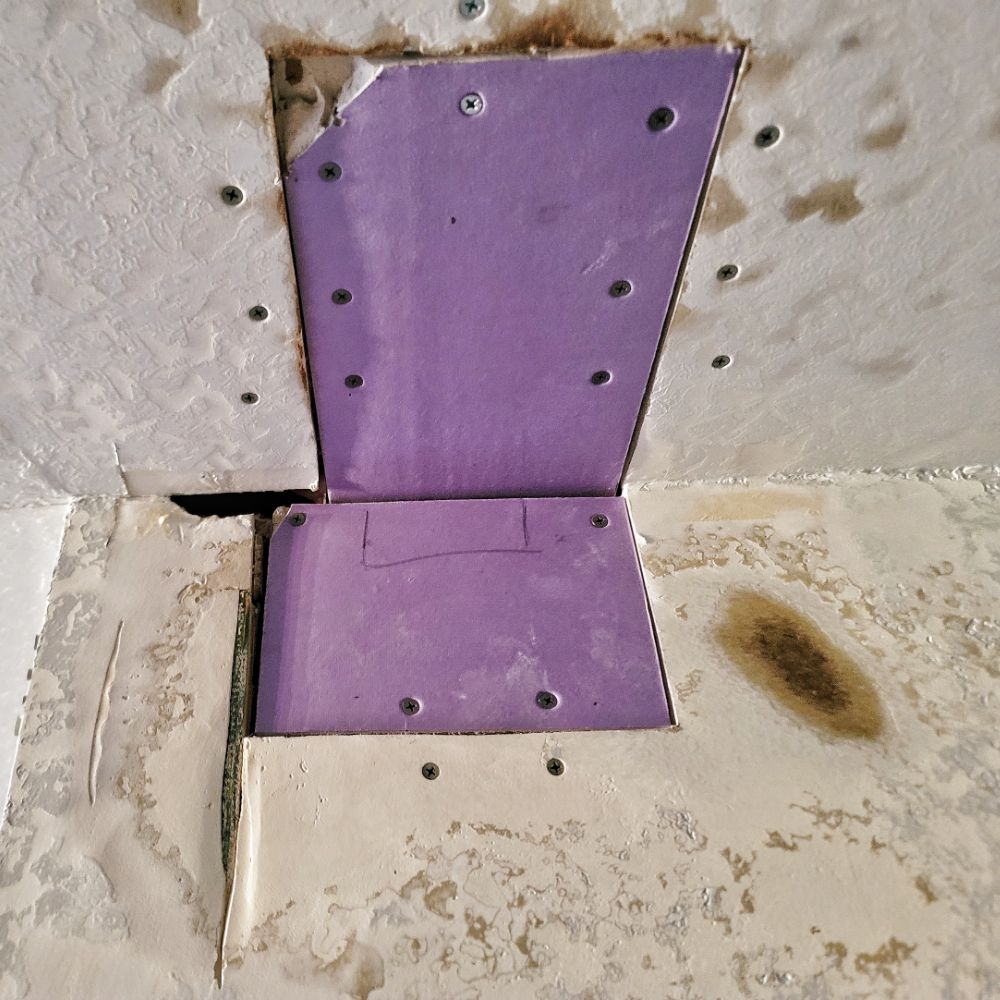
4. Patch
This patch was tricky. If you look closely, you’ll see that the wall section is not entirely sheetrock; a wall was moved, and instead of furring out the entire area to accept a sheet of drywall, the folks simply applied mud and tape directly to the 2 x 4. (We’re not even joking about that.) Our job is to make the drywall problems go away. So, with a few carefully placed screws and the back of the drywall gouged out to give the nail plate room to sit where it needs to, we’re ready to prepack.
5. Prepack.
Large voids require a prepack, or initial coat of mud to make sure the drywall tape doesn’t bulge. Here, you’ll see that though we were quite liberal in our coat, there is still a gap that will be addressed via tape once dry.
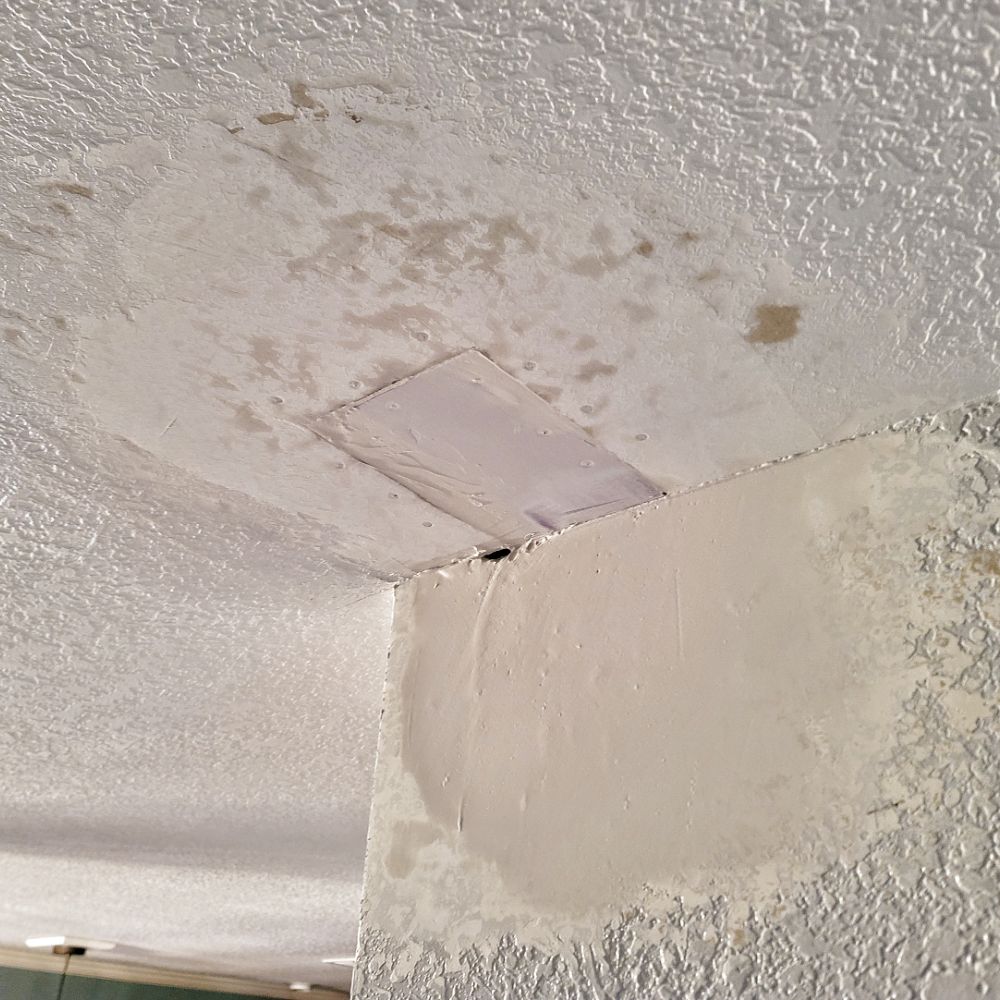
6. Tape and Skim
We neglected to take photos of this part, which is too bad. Suffice it to say, multiple coats of mud are applied after tape is installed to facilitate a solid repair.
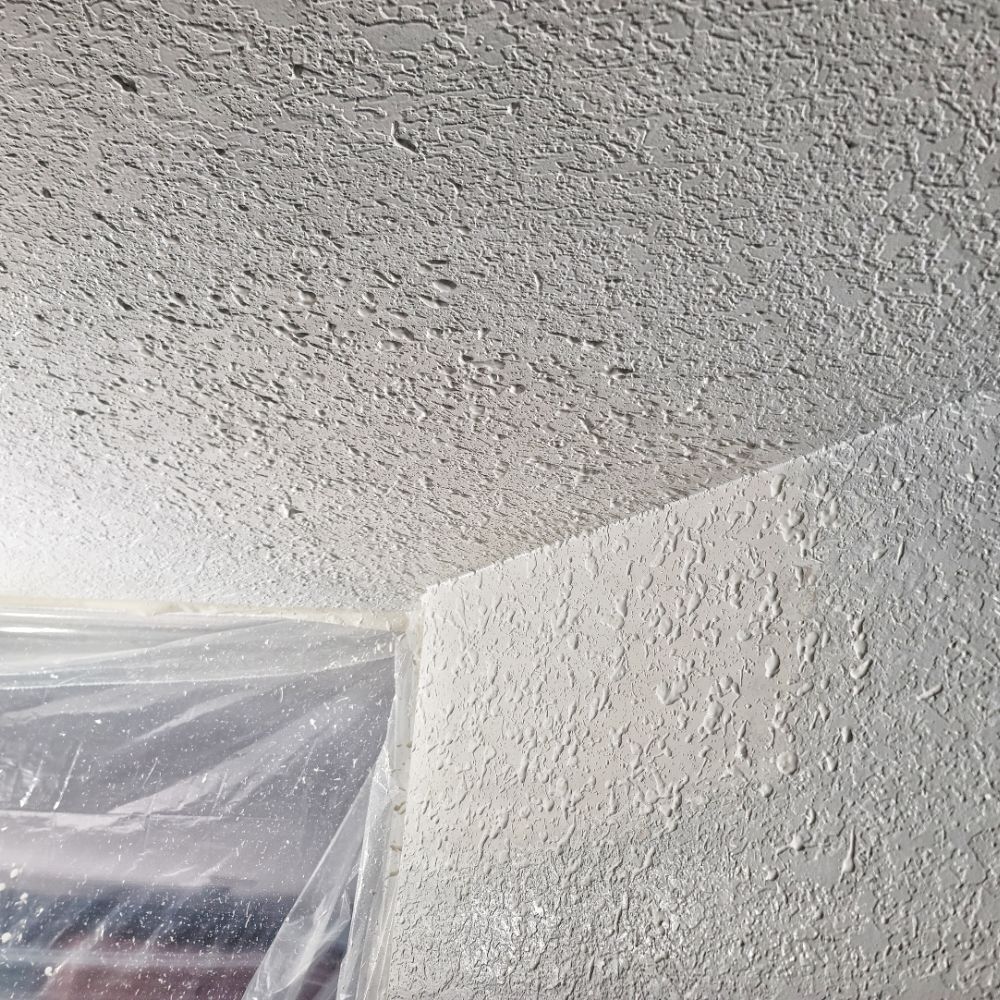
7. Texture Spray
This is a challenging repair! There are three separate textures happening here- Ceiling, original wall texture, and the wall repair texture from the addition previously done. When approaching a repair, you have to get in the mind of the previous person and consider what is being presented, i.e. what were the likely materials used and previous ambient conditions of repair? Thinking thru this process allows for a more complete and aesthetically pleasing repair. Here, the spray splatter field is observed before being “knocked down.”
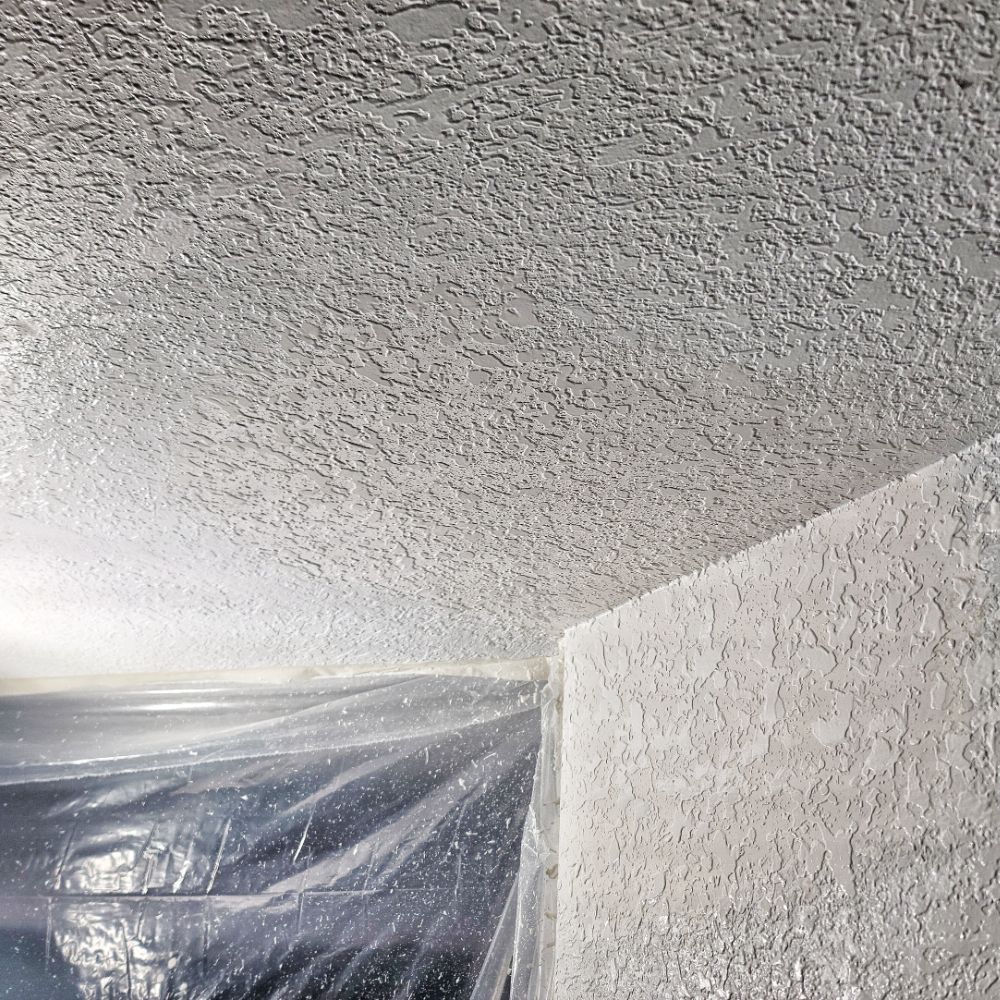
8. The completed repair! The texture is allowed to set up and begin to coagulate/ dry, then is wiped down with a plexiglass blade. The extra texture around the edges of the repair is removed to get rid of the “halo effect” seen in many other patch attempts: although time consuming, the quality in the final presentation is undeniable.
9. Easter Egg Pro Tip
Pay attention to old work. A satisfactory repair is not based solely on the talent of the technician. Rather, it is in the care and consideration of the how and why the aesthetics of a current project present in the way that they do. Also, set realistic expectations with the client. If you have a C- technician, do not promise an A+ repair. Manage and proffer expectations in keeping with what can be reasonably expected.